Documentation Index
Fetch the complete documentation index at: https://docs.clarifeye.ai/llms.txt
Use this file to discover all available pages before exploring further.
Prerequisites
- A Clarifeye teammate with your MCP Server URL, Client ID, and Client Secret from the Deploy tab (see overview).
- A Claude Pro, Team, or Enterprise account.
Step 1: Add a connector
Open the connectors page
Go to claude.ai/customize/connectors and click Add a connector.
Fill in the connector details
- Name:
Clarifeye - URL: Your MCP Server URL (e.g.
https://eu.app.clarifeye.ai/mcp)
Configure advanced settings
Click Advanced settings and enter: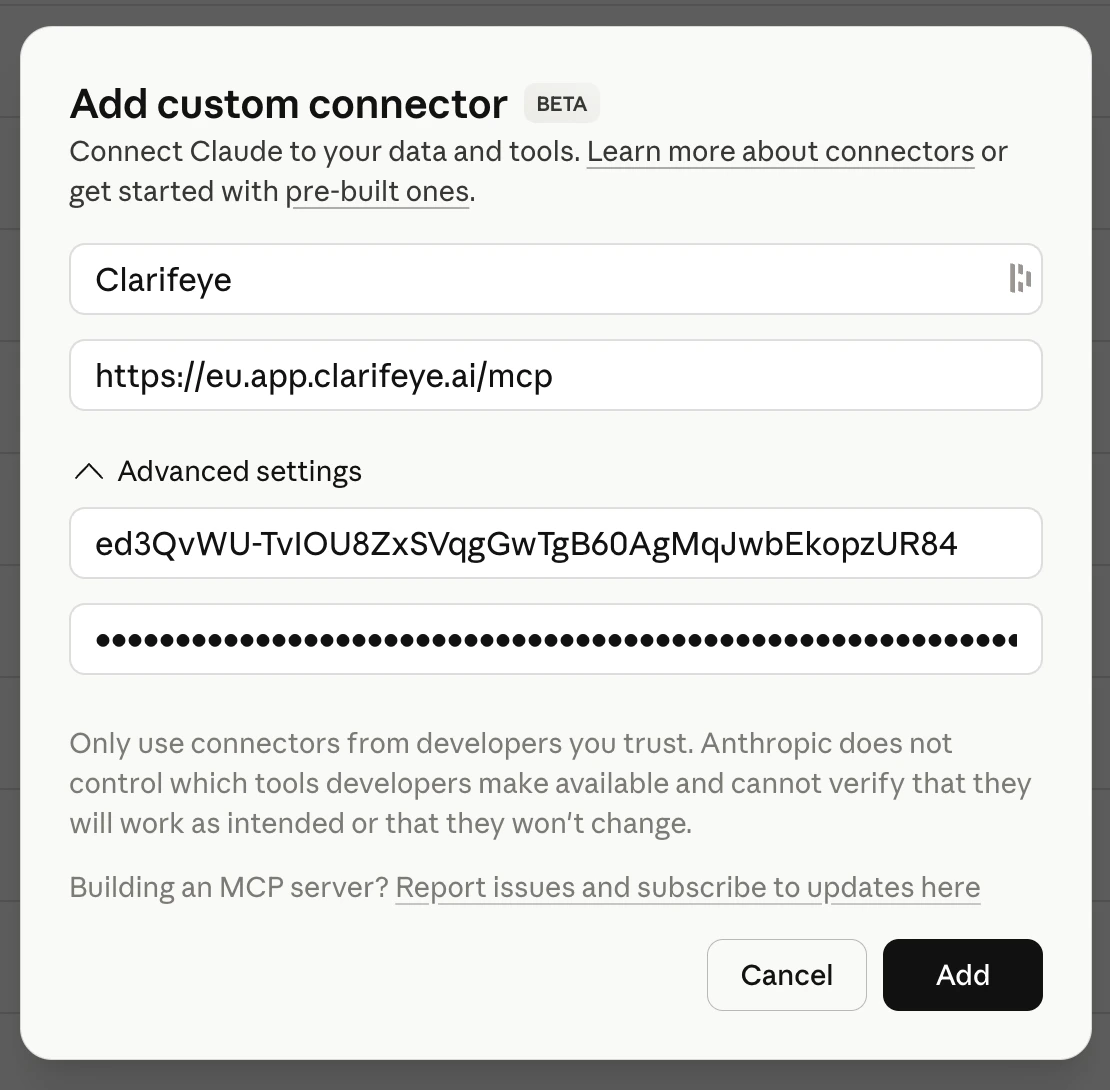
- Client ID: Your Client ID from the Deploy tab.
- Client Secret: Your Client Secret from the Deploy tab.
Step 2: Create the skill
Open the skills page
Go to claude.ai/customize/skills and click Upload a skill.
Step 3: Use Clarifeye in Claude
Type/clarifeye in any Claude conversation to activate the Clarifeye skill. Claude will connect to your Clarifeye teammate and you can start querying your knowledge store, running tools, and invoking playbooks.