Documentation Index
Fetch the complete documentation index at: https://docs.clarifeye.ai/llms.txt
Use this file to discover all available pages before exploring further.
Prerequisites
- A Clarifeye teammate with your MCP Server URL, Client ID, and Client Secret from the Deploy tab (see overview).
- A Microsoft 365 Copilot license.
Step 1: Add the MCP tool
Fill in the server details
- Server name:
Clarifeye - Server description:
Leverage the Clarifeye knowledge store - Server URL: Your MCP Server URL (e.g.
https://eu.app.clarifeye.ai/mcp)
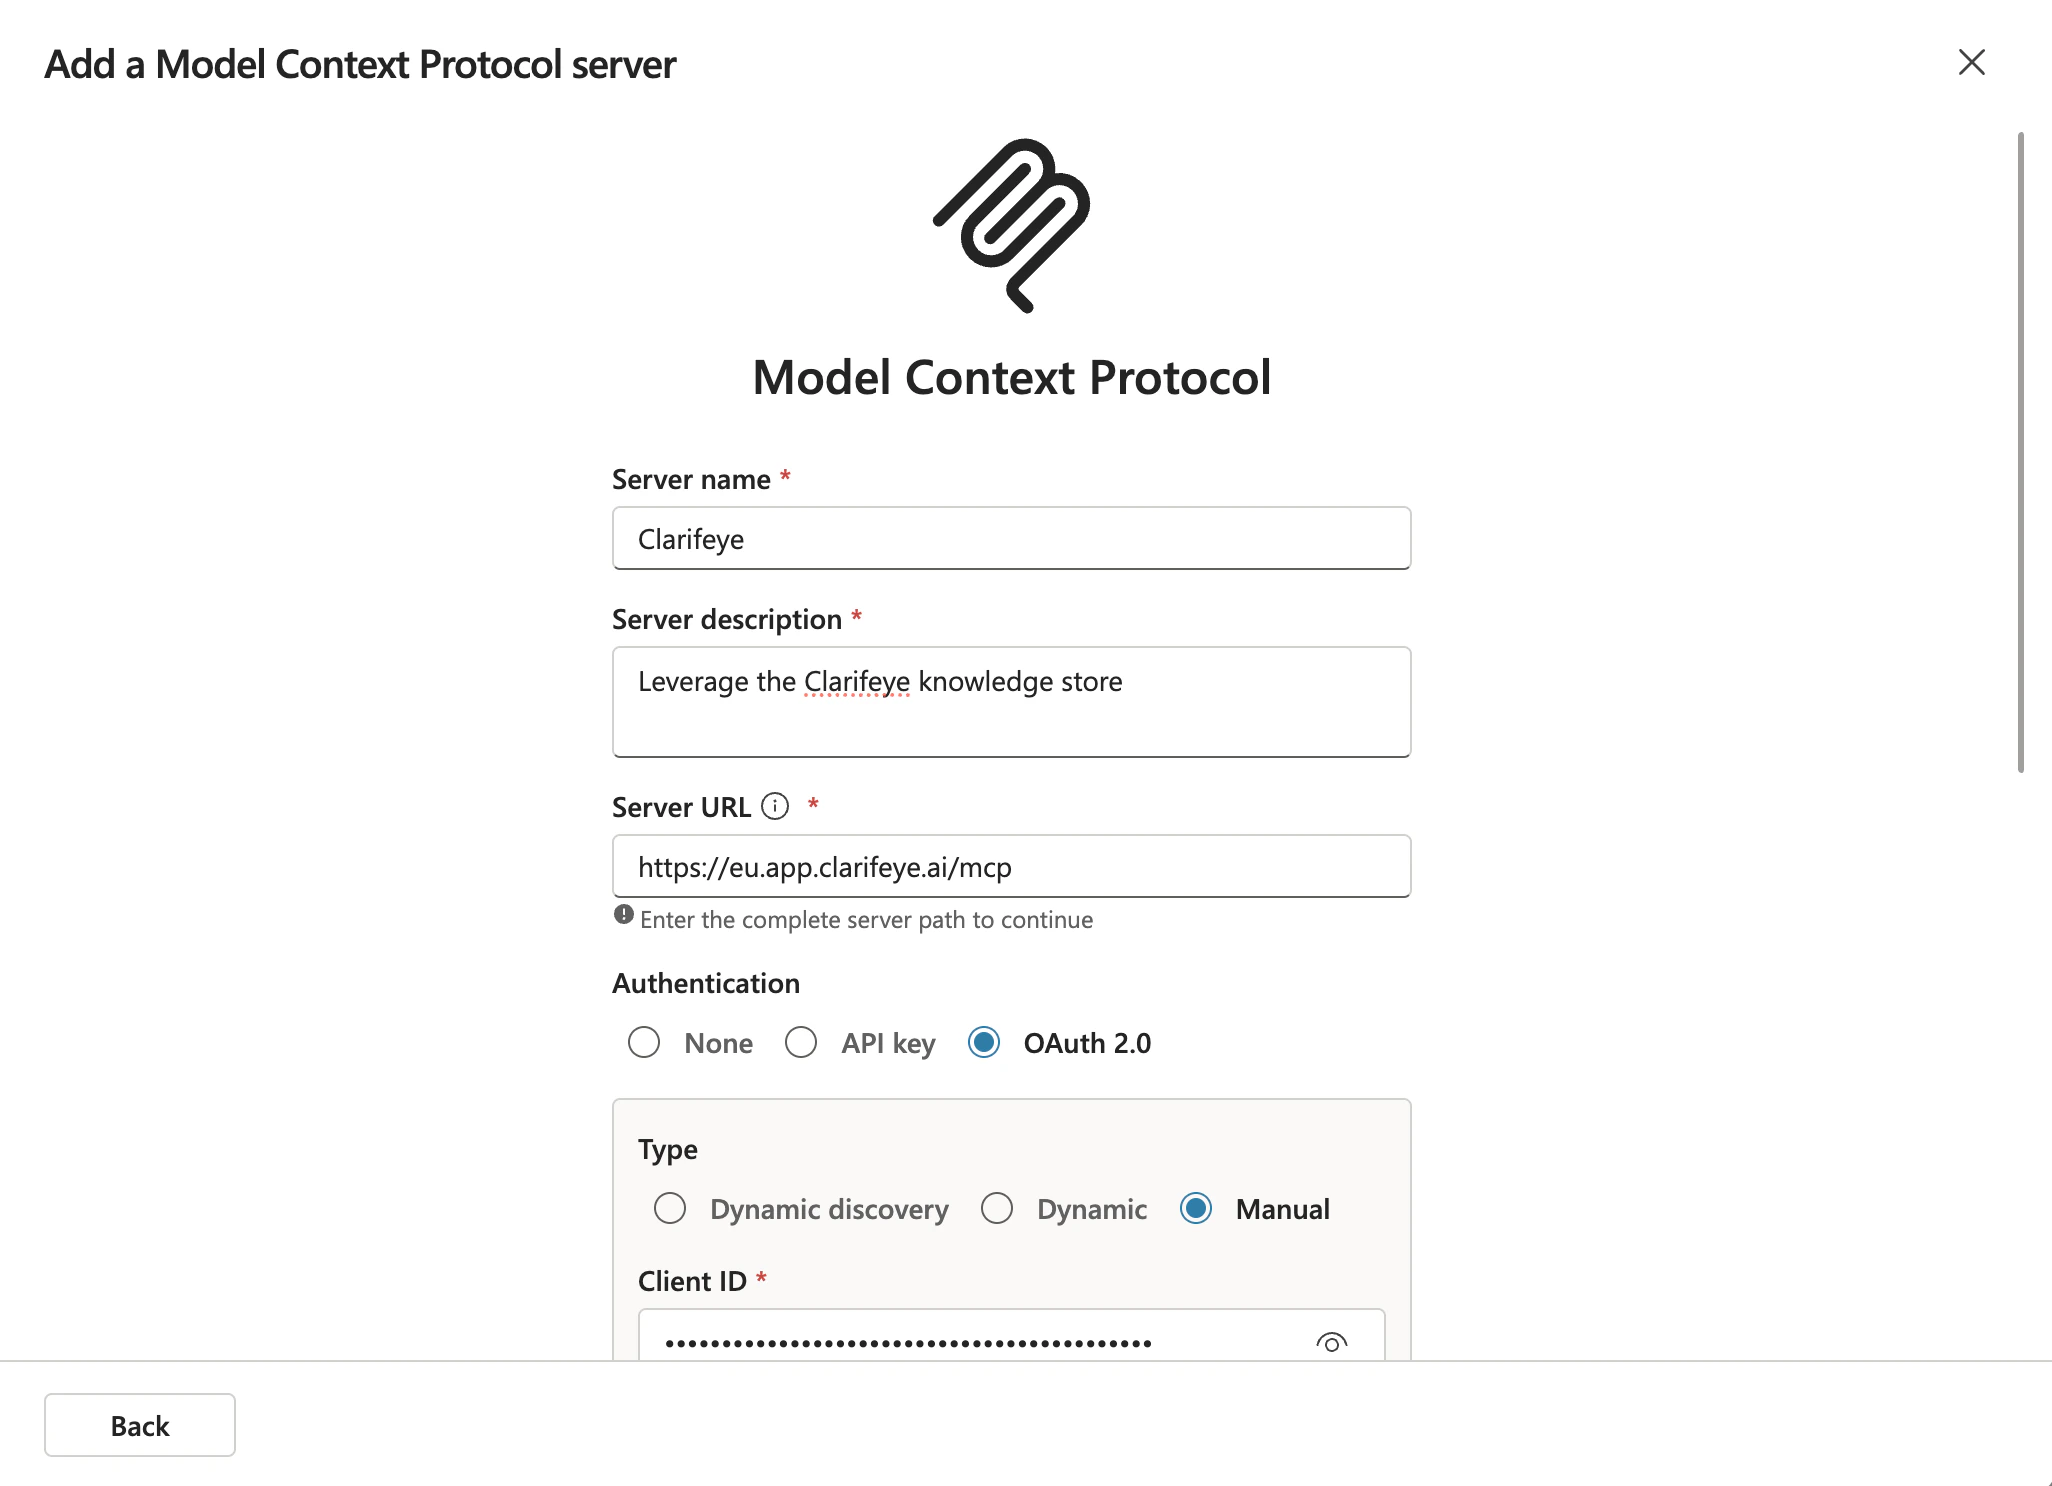
Configure OAuth 2.0 authentication
Select OAuth 2.0 as the authentication method and set the type to Manual. Then fill in: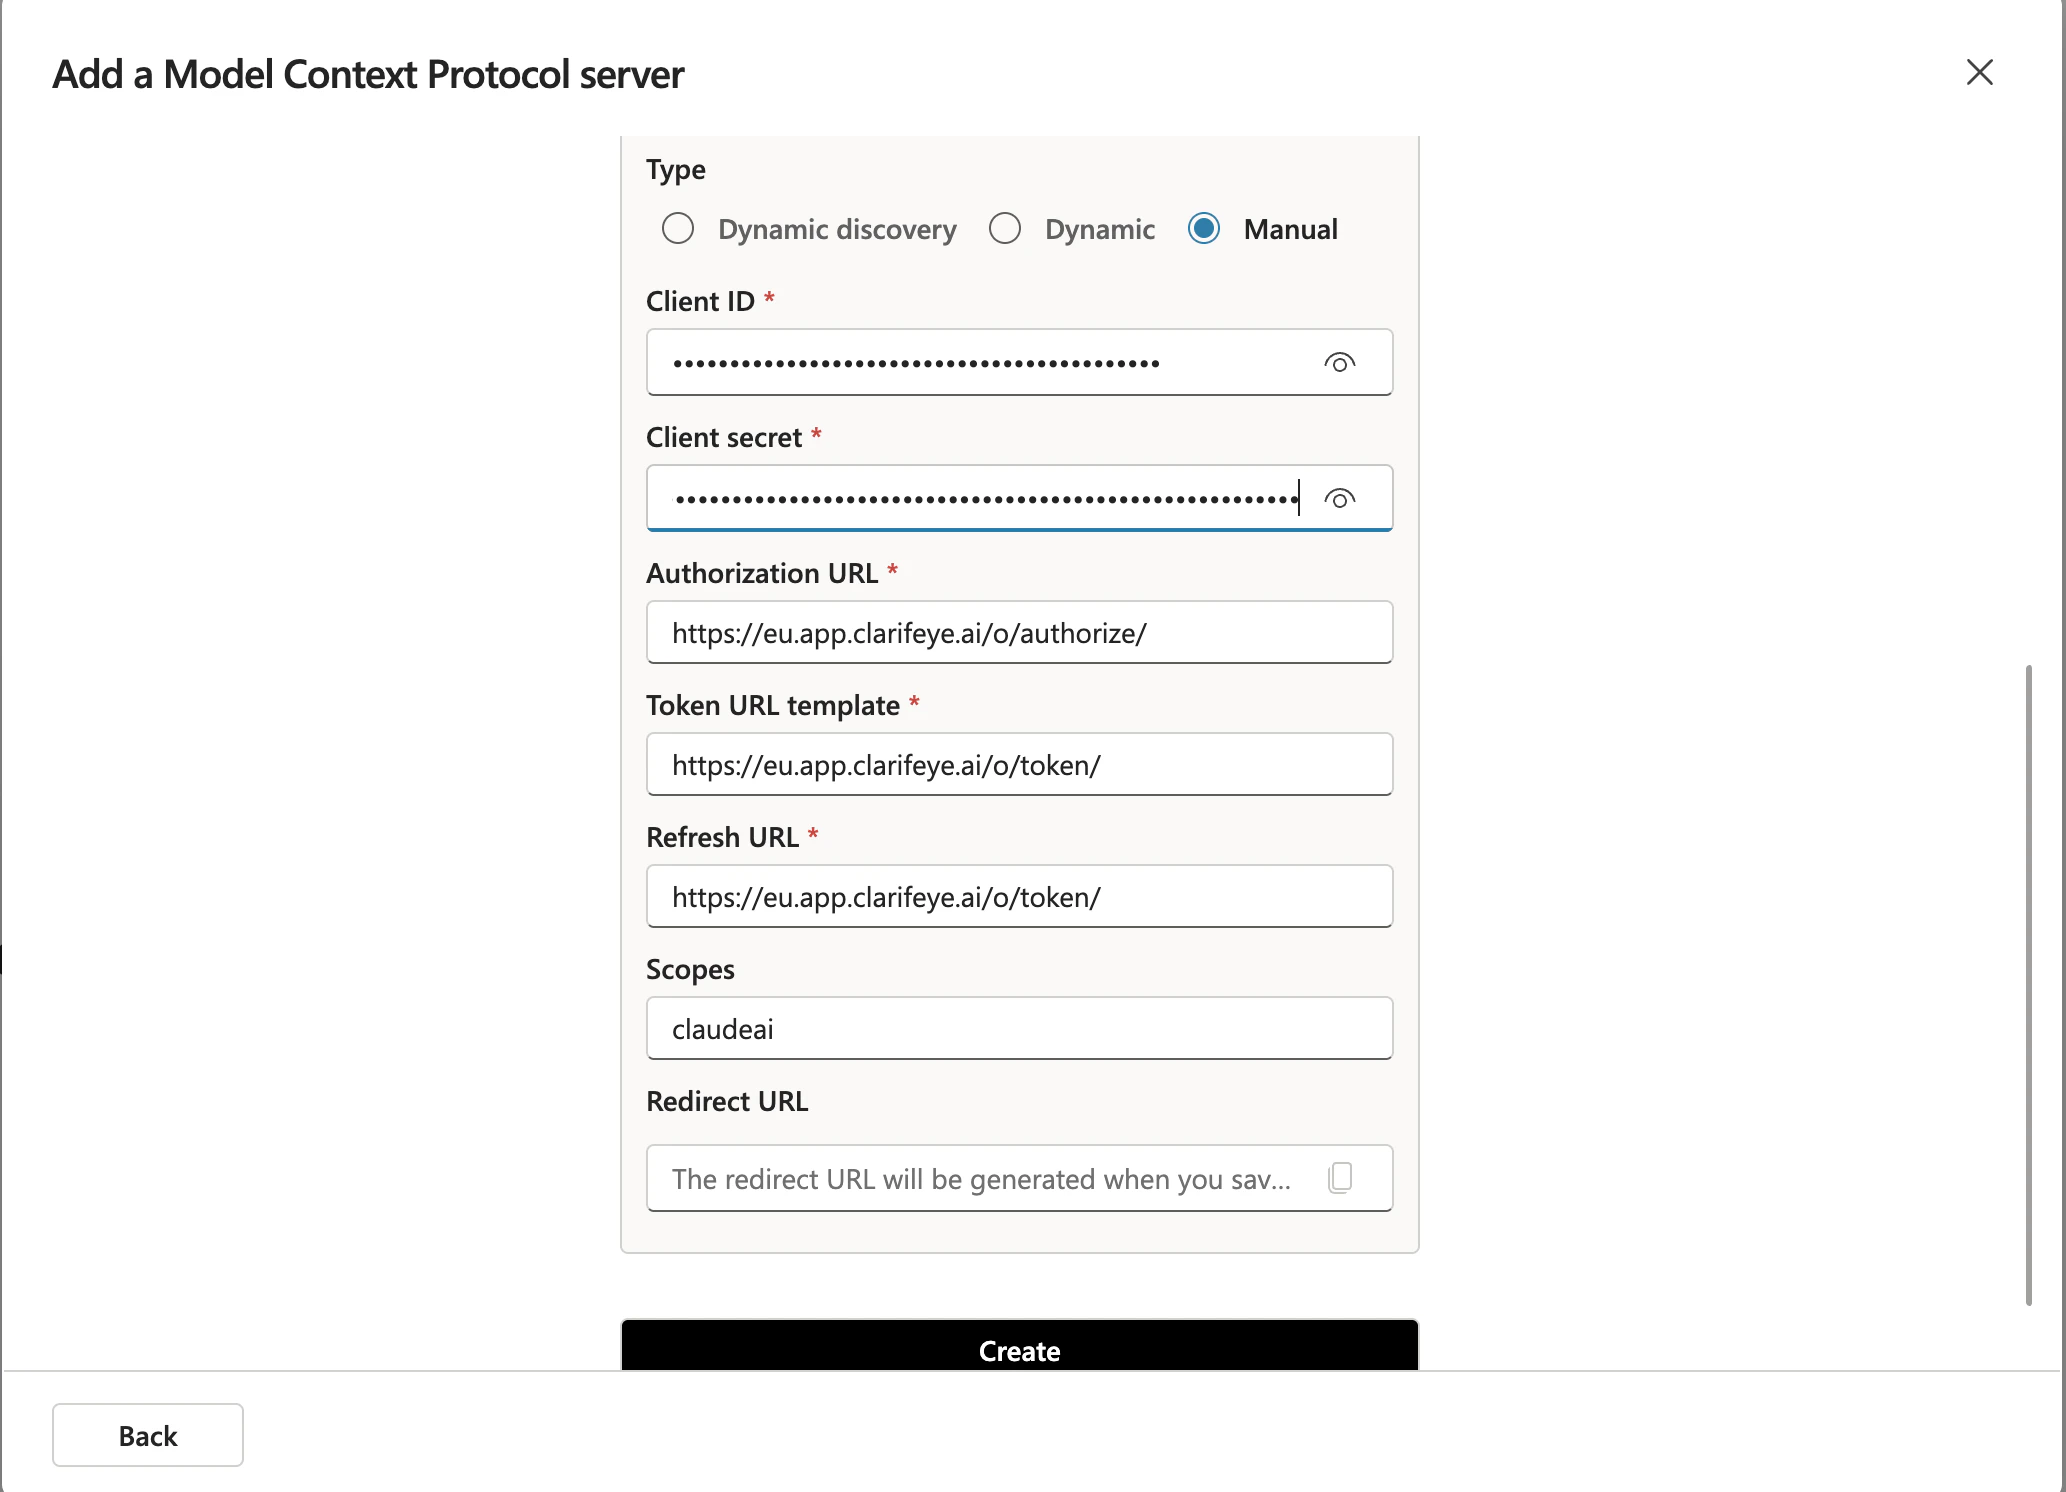
- Client ID: Your Client ID from the Deploy tab.
- Client Secret: Your Client Secret from the Deploy tab.
- Authorization URL:
https://eu.app.clarifeye.ai/o/authorize/ - Token URL template:
https://eu.app.clarifeye.ai/o/token/ - Refresh URL:
https://eu.app.clarifeye.ai/o/token/ - Scopes:
claudeai
Register the redirect URI in Clarifeye
Copilot generates a Redirect URI for the MCP server. Copy it and paste it into the Redirect URIs field on the Deploy page you already have open in Clarifeye, then save.